(Managed through Rights)
The JD creation form is divided in to 10 sections
The JD creation form is divided in to 10 sections
- Basic Details
- Role and Industry
- Qualification, Experience and Skills
- Requirement Details
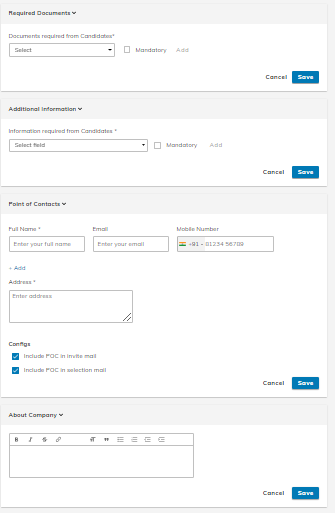
- Required Documents
- Additional Information
- Point of Contact
- About Company
- Video JD ( Prmium)
AND Links are provided for activities like
- Manage questionnaire (If you intend to conduct One-way interviews)
- Manage Schedules
- Manage Invites
- Matching Interviewers
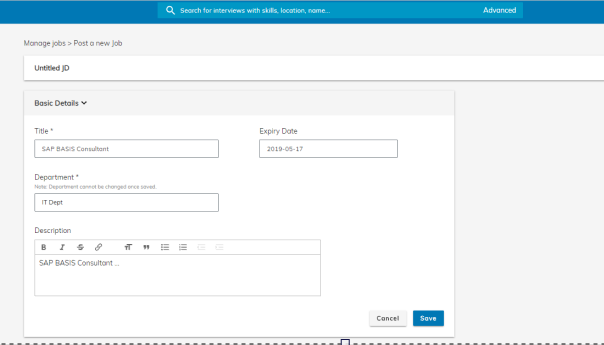
- When you click on ‘Post a Job’ the ‘Basic Details’ section opens. After you have filled the basic details and saved this section, the entire JD creation form opens. (See screenshot above)
- Each section has a ‘Save’ button at bottom right. Data entered in each section needs to be saved
- Data saved in all sections gets saved as a ‘Draft JD’.
- The mandatory fields that you need to fill for creating a Draft JD are Title and Department in the ‘Basic Details’ section.
- For you to be able to start activity on a JD, you must ‘activate’ the job (Top right corner of the page has the ‘Activate’ button and this subject to you having the right to activate. (Managed through Rights) JD needs to be ‘Active’ for you to be able to start inviting, scheduling, tagging videos to it or publishing the JD.
- If you DO NOT have the right to ‘activate’ then you must add at least one Hiring Manager (Business Stakeholder) who has the right to activate and then click on the request approval button at the top right of the page. This triggers a mail to the said Hiring Manager.
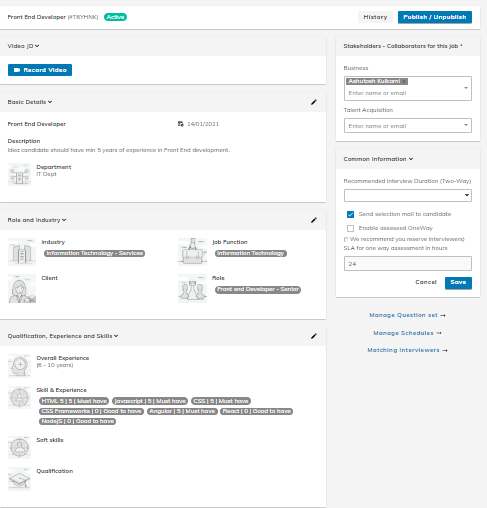
- The mandatory fields that must be filled for activating are
- JD title
- Department
- Skills (Minimum 1 and up to 10)
- Stakeholders for the Job (logged in user becomes the default stakeholder)
You can also add additional details like:
- Industry
- Job Function
- Role
- Soft skills
- Qualification
- Location
- Employment Type
- Vacancy
- Salary
- Description about the Company
- Video JD: A video representation of your job requirement
Depending on the role of the user who is creating the JD, she automatically gets added as a Stakeholder, either as a Talent Acquisition Stakeholder or Business stakeholder.
All sections have a small edit icon on bottom right and each section must be saved. The drop downs in ‘Required Documents’ and “Additional information” can be configured according to client requirements.
Common Information Card
The small card on the right side of the page allows you to configure the following
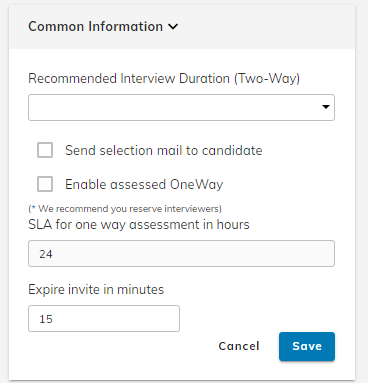
Selection Mail to Candidate : if Selection mail is to be sent automatically. If this is enabled, the system will directly send a selection mail to the candidate. The content of this mail can be configured.
You can also enter the POC details during JD creation and configure if and when these are to be shared with the candidates (with invite or at selection).
Enable Assessed One way (Premium): If this is enabled, then the system will automatically notify matching interviewers and the interviews shall be shared with such matching interviewers for assessment. The SLA for assessment can also be set here. (Min value is configured based on agreed SLA)
Expire Invite in mins ( One way invite) : This feature comes handy for an online test where one wants to send bulk invites and allow only a small window of few mins for all candidates to start the test thus avoiding the possibility of any candidate(s) circulating / discussing questions and answers
Below the common information card are the links to navigate to Questionnaire, Two way schedules and Matching interviewers.( Only for YCOI ie. Interviewing as a Service model)
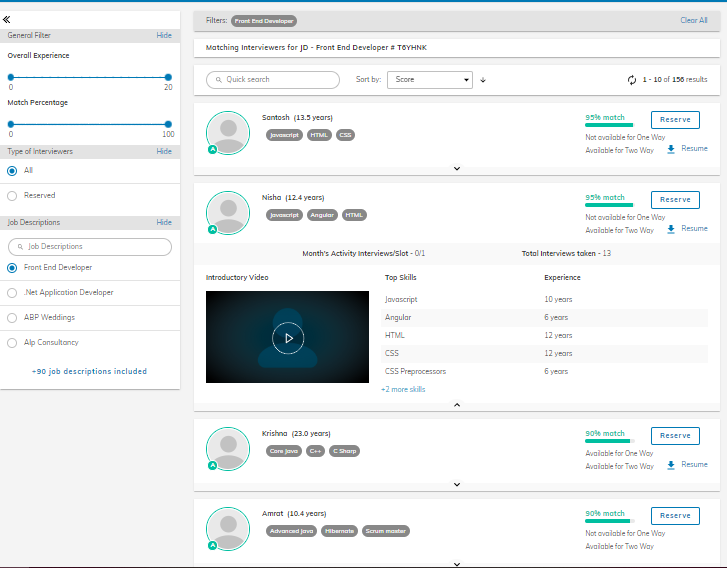
Matching Interviewers
Only for YCOI ie. Interviewing as a Service model. Managed through Rights
The Matching interviewers link navigates the user to a page where matching interviewer profiles are listed in descending order of % match. ( The matching logic predominantly gives weightage to Skills, Industry Job Function and years of experience specified in Job) The % weightages for these fields can be customized based on request.
The list also displays, the Skills, Introductory Video of the interviewer, current months activity and total interviews taken.
You can also reserve particular interviewer(s) from this list for specific JD. ONCE YOU RESERVE AN INTERVIEWER OR INTERVIEWERS FOR A JD, the system will not consider other interviewers for Assessed One way. For Two way YCOI schedules, you can toggle as described under the section ‘Schedules’
6: Video JD (Managed through Rights): You can record a video JD. Clicking on ‘Record Video’ first opens a screen for system permissions (permission to access to camera and microphone) and then takes you to a system test screen. It is recommended that you do the system test to ensure audio-video quality comes out right.
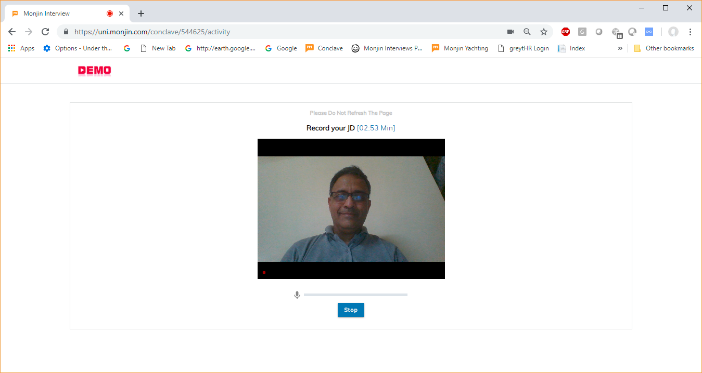
You can record a video JD of up to 3 mins duration where you can talk about the requirements, project, company etc.
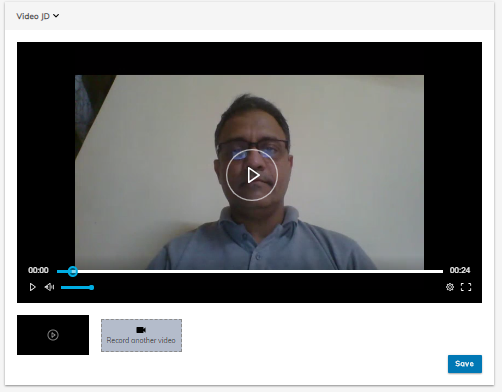
Once you stop the recording, it takes a few minutes for the video to process. You can then review the recording and decide to ‘save’ it or take another shot by clicking on ‘Record other video’. You can take up to 3 attempts and then save any one to them.
7: Stakeholders: You can add the names of Hiring Managers / TA Managers who must collaborate on the JD. Once a user is added as a stakeholder, she gets rights to tag/ de tag videos from the JD, provide feedback (and verdict- if she is a HM) on videos tagged to the JD. Tagging, de-tagging and expiry reminder notifications are sent to stakeholders. Once new videos are tagged to the JD or created through invites/schedules, the system starts counting ageing for feedback and verdict for users who are stakeholders
8: Manage questionnaire – Click here for details
9: Request activation and History: If you do not have the right to ‘Activate’ a JD, you see a ‘Request activation’ button on top right corner. In such case, you must add at least one Hiring Manager (Business Stakeholder) who has the right to activate and then click on the request activation button. This triggers a mail to the said Hiring Manager. If you have ‘Activation’ right, you will see an ‘Activate’ button on top right corner of this page. Clicking on the same activates the JD.
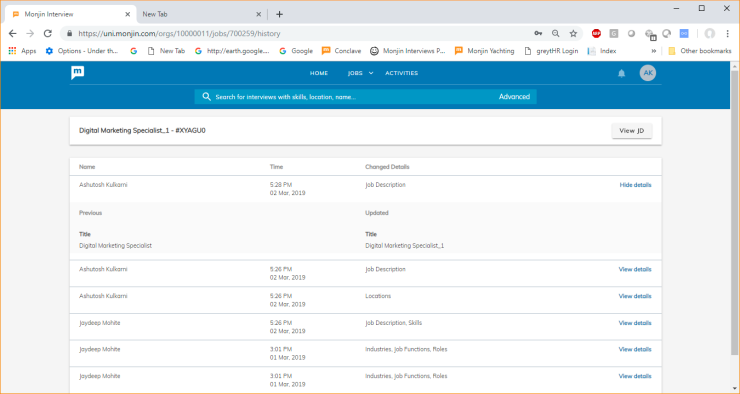
The ‘History’ tab is where you can see the log of changes/edits done to the JD. The log includes name of user who has edited, the date and time, the field which was edited. The ‘View Detail’ button at the end of each line item displays the details of the changes made.
Publish
(Managed through Rights)
Once activated, the ‘Activate’ button converts to ‘Publish’, clicking on this will publish the JD to the Monjin website as also to your company’s LinkedIn page (if there is one created) *. A JD needs to have at least One-way interview questionnaire for it to get published.
This action also creates a link which is mailed to the stakeholder and the stakeholder can then mail it to candidates.
