Accepting invite and adding to calendar
Once some one from your Organizations schedules a two way interview, you will get an e-mail with a calendar invite attached. Double clicking on the ‘Interview Invite’ attachment will book your calendar on Outlook or gmail.
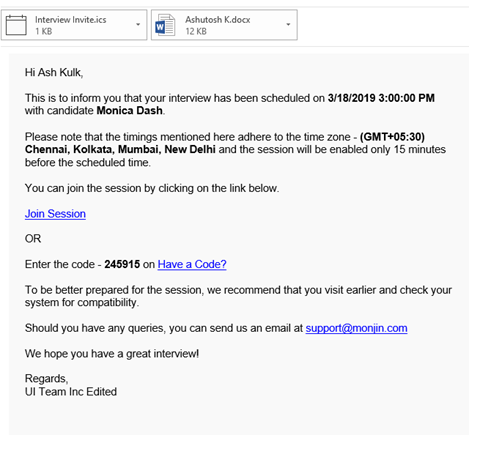
Joining the interview
You can go to the interview by clicking on the ‘Join Session’ link in the mail or going to monjin.com and entering the code mentioned in the email.
You can only enter the interview 15 mins before the scheduled time
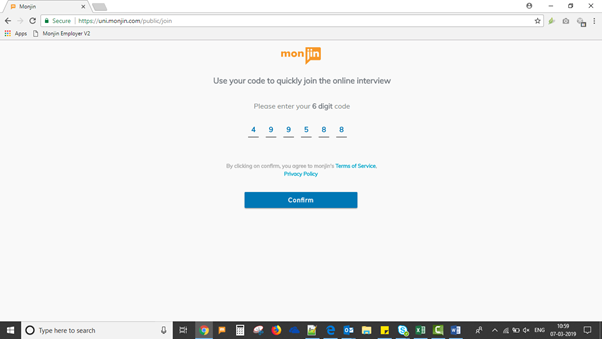
Post accepting the T&Cs and privacy policy you enter the green room where you get the following details: (These terms will only appear for the first interview you take)
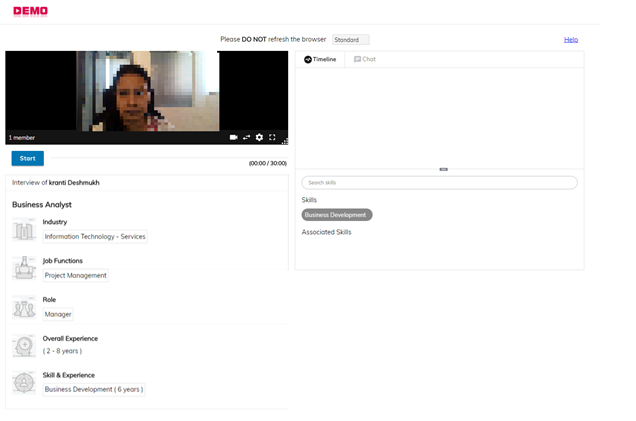
Green Room
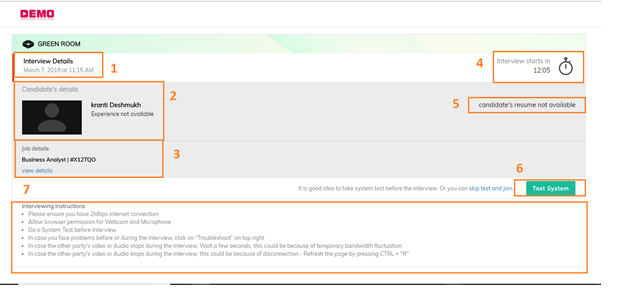
- Interview Details: You as an interviewer can view the details of the interview (date and time)
- Candidate Details: Name and experience (if available) of the candidate entered by the user scheduling the interview
- Job Description: Name and ID of the job created. “View Details” gives the entire job created
- Timer for interview: A timer that notifies time remaining for the interview. If you are late the timer will display time past from interview start time
- Candidate Resume: You can view the candidate resume if it is uploaded by the user scheduling an interview
- Test My system: You can test your system to verify the bandwidth, audio- video. Interviewers have an option to skip the system test and proceed directly to the main interview
- Instructions: You can go through the instructions before joining the interview
Actual video interview (Conclave)
After you complete the system test, you are taken to the actual interview session (conclave). If the candidate has not joined the interview, you will see yourself in the interview screen. Please ensure that you DON’T CLICK ON “START” BUTTON till the candidate has joined.
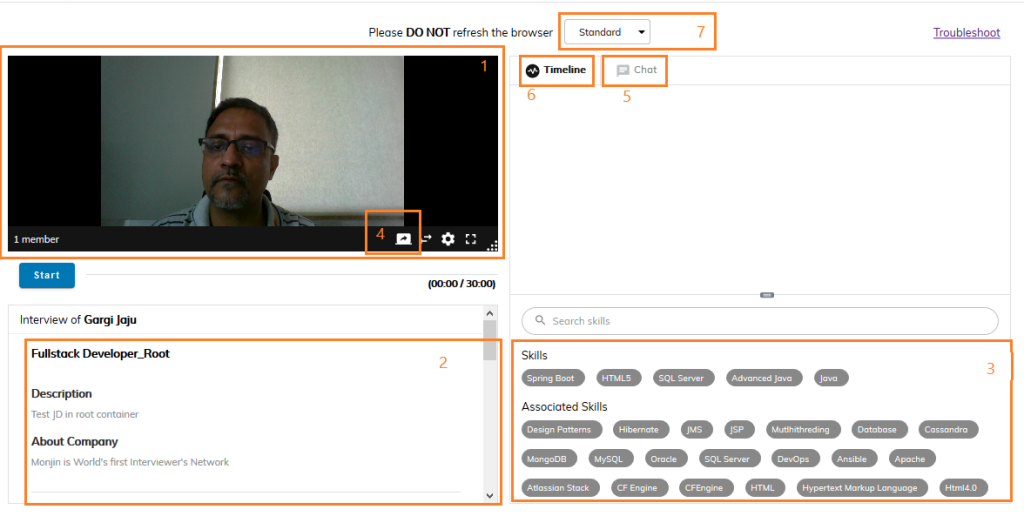
The important items on the interview screen are described below
- The video screen : This is where you see the video streams of the candidate and your self. The bottom right corner of this section can be dragged digonally to contorl the size of the video window.
- Job Description : If the interview is against a JD, you can see the JD just below the Video window.
- Skills and Associated Skills : The bottom right corner of the screen has 2 sections –
- Skills : These are the skills that are required for the Job. You are required to assess the candidate on all the skills appearing here
- Associate Skills : These are the skills realted to the main skills in the JD and displayed here, for ease of indexing the video in case the discussion turns to such associated topics.
- Screen sharing : The left most icon on the bottom right of the video window is for screen sharing.
It is important for you to know certain limitations w.r.t screen sharing as you may be required to guide the candiadte in sharing their screen when you are trying to assess coding / designing skills etc.
- Screen sharing is currently suported only on Mozilla Firefox (52+) and Google chrome (72+). The screen sharing stream from the candiadte is also recorded.
- When a user clicks on the screen share icon – the browser again asks for permission . It is advisable to warn the candidate about this and ensure she does not decline the browser permission as that stops the ongoing audio / video stream as well.
- It takes a few seconds for the shared screen to appear on your video window
- In case the candiadte or your bandwidth is not sufficient, screen sharing may not work properly. In such cases, you can use the chat window for coding challenges
- Chat : Just right of the top of the video window are 2 tabs – Timeline and Chat: You can exchange text messages with the candiadte from the chat window. The chat is logged and visible to clients. This window can also be used for small coding tests.
- Timeline : The timeline tab shows the tags that you have dropped on the video to index the session by skill/ sub skill. Each of the tags that you drop creates a time stamped index on the video. You are required to provide a start based rating on each of the tag that you drop
- Standard and Code first views : The view shown above is the standard view. You can change that to ‘Code First’ view by clicking on the drop down at the top center of the screen.
Code First View : In this view, you can choose the coding language from the drop down at the bottom of the chat window for syntactical support . For sending the chat click the arrow icon on the bottom right. IN case of multi party interview, you can choose the recipients.
Tagging and Indexing
Monjin has a unique feature of indexing the video interview with Tags of skills and topics being discussed. This is to allow ease of navigation during playback.
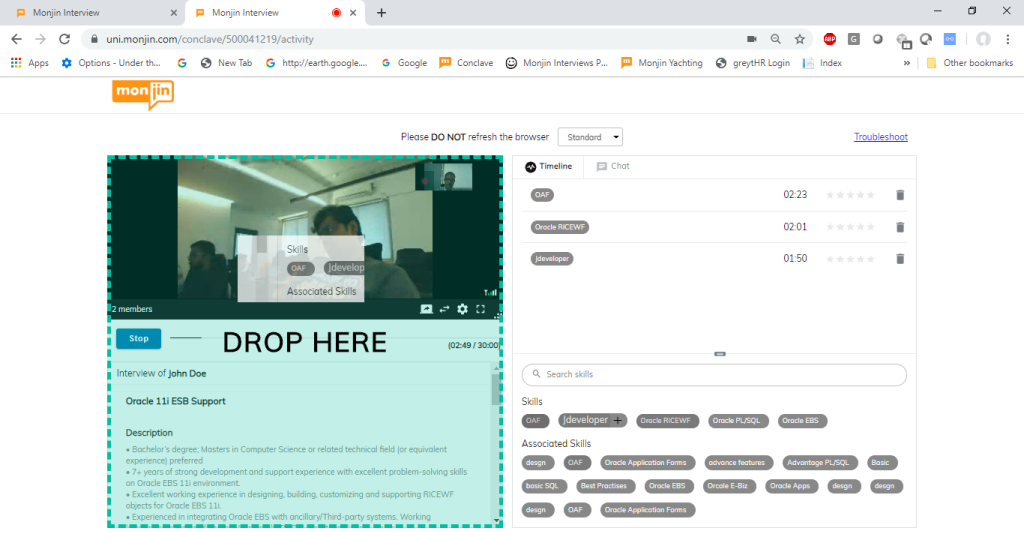
Once the candidate joins, and you start recording the session by clicking on ‘START’ you can drop the Skills/ Associated Skills based on the topic being discussed. The process involves dragging the tags and dropping them any where on the video section ( as shown below)
You can search skills other than once in the JD and drag them on the timeline. Skills associated with JD skills are displayed under ‘Associated skills’ You can also use these to index the interview by dragging them onto the video frame.
- You can chat with the candidate using the chat option
- Following actions can be performed:
- You can share your screen using Mozilla Firefox
- You can adjust the view of your screen
- You can use full screen view of the interview
- You can drag the bottom right corner of the video frame to re-size it as per your choice
- You can toggle between the ‘Standard’ and ‘Code first’ views
- You can also delete the tags added on the time line- for this you need to click on the delete icon twice. The first click will turn the bin icon to red color, clicking it again will actually delete the tag.
- To stop the interview, click on stop
1 and 1 A: Drag and Drop Skills
You can drag the skills present in the JD and drop it on the video section. Skills dropped this way, appear on the timeline with a time stamp. You can also rate the skills here itself or post interview
2 : Search Skills
If you want to assess the candidate on some skill, but cant find it in the “Skill / Associated Skills’ tags appearing on your screen, you can can search for it in the serch bar appearing below the time line and then drag them on the timeline.
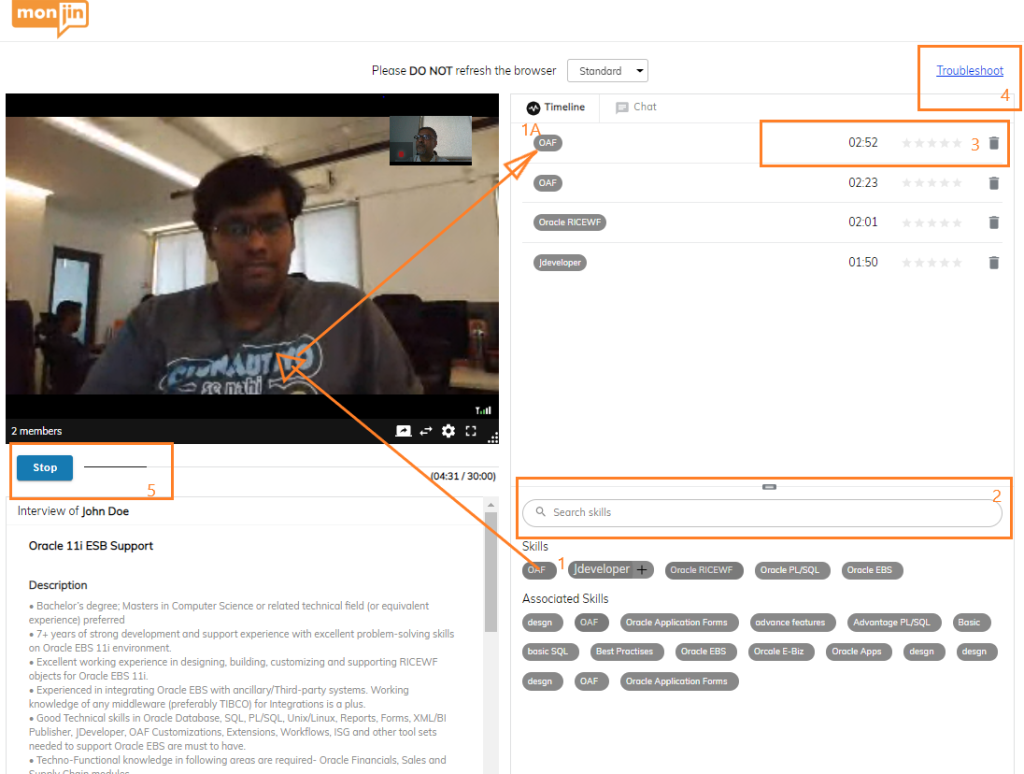
- : Delete Tags
In case a tag gets added inadvertently. you can also delete the tags added on the time line- for this you need to click on the delete icon twice. The first click will turn the bin icon to red color, clicking it again will actually delete the tag.
- :Troubleshoot
In case you or the candidate are facing any problems in the session, you can click on the troubleshoot link on the top right of the screen
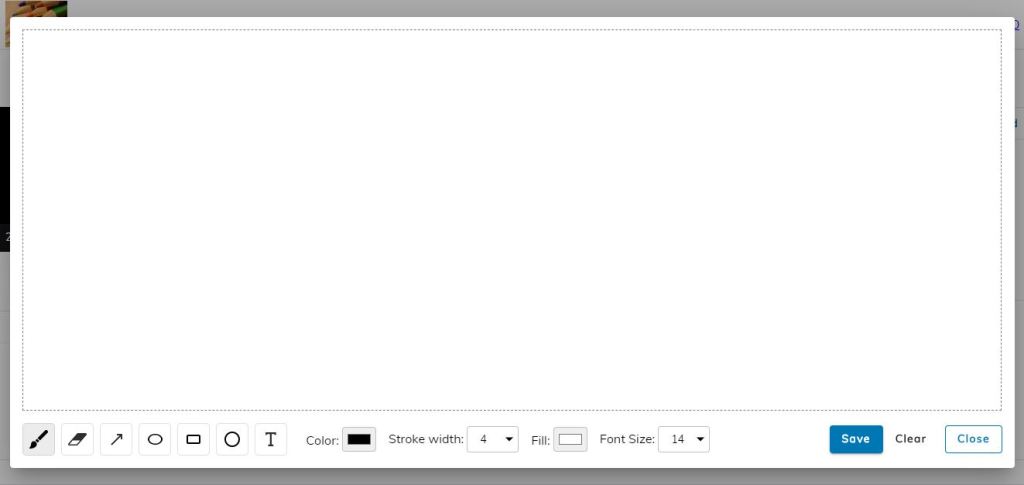
White Board
You also get an option to open whiteboard on top right
Configurable at Apex level – Once enabled, the interviewer can launch the whiteboard in the conclave after starting the interview. If the activity done on the whiteboard is to be recorded, then a) The interview must be a recordable interview and b) The interviewer needs to enable screen sharing option at launch of whiteboard. The system prompts the interviewer to start screen sharing for recording whiteboard activity. Whiteboard is a collaborative -allows all participants to draw simultaneously.
Note – Ideally interviewers should ensure that there is a good 5-mins gap from the time they end a whiteboarding / screen sharing session and end of interview. Trying to ‘STOP’ the interview immediately after the close of whiteboarding/ screen sharing session may cause problems in ‘STOPPING’ the interview.
- STOP recording
Once you are done with the interview, do not forget to click on ‘STOP’ button below the video screen
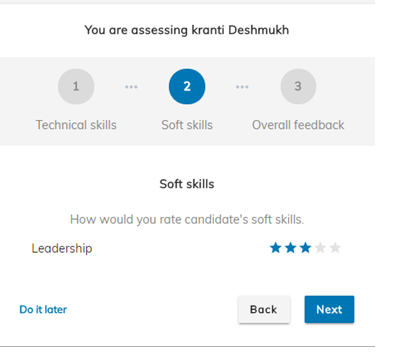
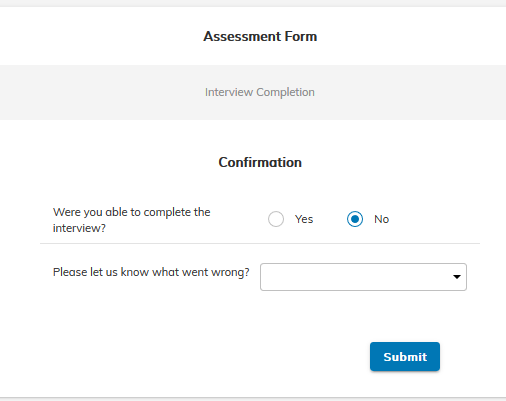
Assessment
After you stop recording, you come on the Assessment Page. First you have to confirm that the interview was completed successfully – in case it had to be stopped incomplete, you need to mark it as ‘Incomplete’ and provide reasons in the drop down
Assessment can be done either immediately after the interview before you close the browser, or you can come back to the assessment page anytime within 48 hours of interview completion by clicking on the same link that you get in the schedule e-mail.